After spending a few years in the POD and dropshipping space, I honestly do believe every creative seller should eventually open their own (official) ecommerce store.
Still though, I think it’s fair to say that Etsy’s probably the easiest place to start off.
All you need is a great POD partner (like Gelato), and an account, and you can start selling pretty much immediately, without having to build an audience from scratch.
Millions of buyers hop on every month looking for something personal or just a little different.
Really, that’s part of what makes Gelato such a great choice for Etsy sellers, it’s not just that the product quality is fantastic, or that the company ships worldwide, it’s that it appeals to what these marketplace buyers are looking for: personalization, and sustainability.
If you’re thinking of launching your own store on Etsy with Gelato this year, here’s my step-by-step guide on how to do it (without getting overwhelmed).
How to Sell on Etsy with Gelato: The Step by Step Guide
The first bit of good news I can give you is that linking Gelato and Etsy is really easy. There’s even a quick-start guide with videos here if you need it. You don’t need APIs or anything confusing like that.
All you really need is accounts with both platforms, and a bit of a plan for how you’re going to manage your store.
Step 1: Creating Your Etsy Account
I’d usually recommend doing this part first, although you can start with a Gelato account, then an Etsy account if you prefer.
Honestly though, it feels a lot easier to have a storefront before you start exploring products and pricing options.
You can create an Etsy account for free, and the site walks you through the process of “filling out” your storefront, just:
- Go to Etsy.com and click the button for “Sell on Etsy”
- Fill in your email address, username, or password, or use Google to sign up.
- Follow the prompts for naming your store, choosing your language/currency, and setting your store preferences.
- Create a single listing (it can just be a placeholder for now)
- Add your billing and payment details
The only thing to keep in mind here is that while your Etsy account is free, there are fees you’ll need to budget for:
- $0.20 per listing (every four months)
- 6.5% transaction fee
- roughly 3% + $0.25 for Etsy Payments
You’ll also need to spend a little extra for things like Etsy Pattern or Etsy Plus, but I wouldn’t recommend worrying about that just yet.
Step 2: Creating Your Gelato Account
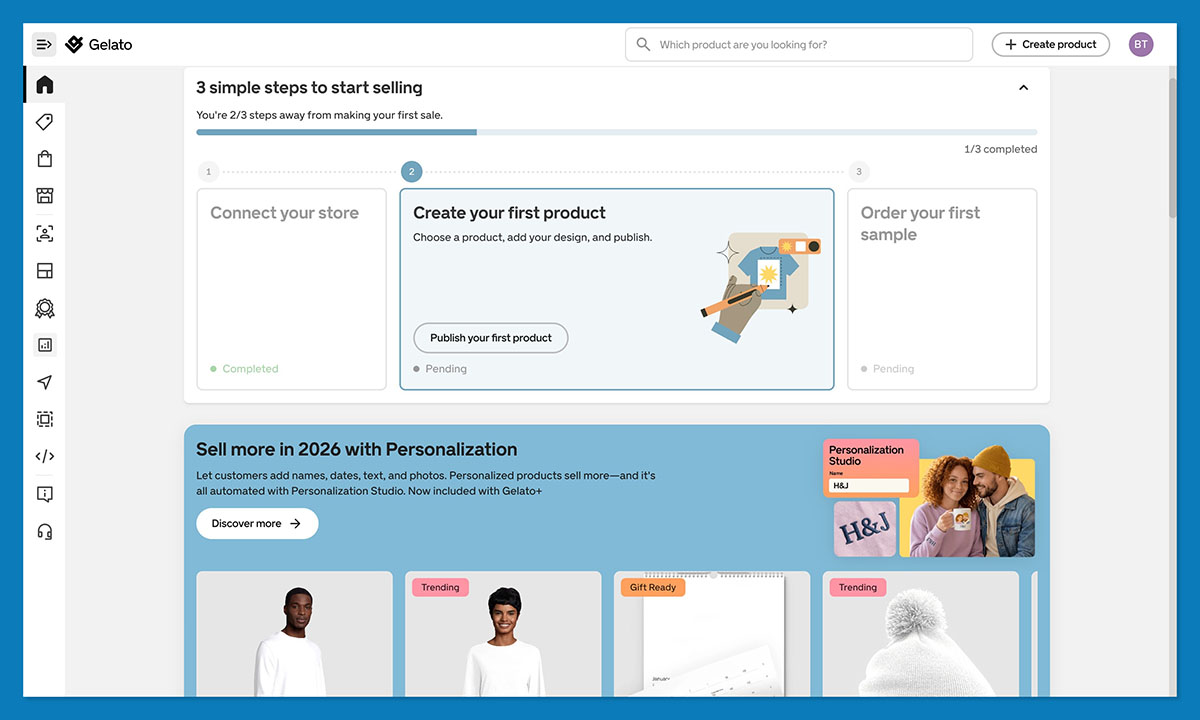
Creating a Gelato account is just as simple as signing up for Etsy. You click on the “Get Started” button on the website, drop in your details, and you’re sent straight to your dashboard.
The first thing I usually do is wander around the catalog. Gelato’s product range leans heavily toward the stuff Etsy shoppers already go hunting for:
- Posters
- Framed prints
- Mugs
- Apparel
- Cards
- Calendars
Their art prints are the standout, though.
Something about the paper stock and color accuracy just feels more “gallery weekend” than “cheap flyer print.” If you’ve tested enough POD vendors, you start noticing those little differences.
Then there’s the design editor. You can experiment a little bit with this now if you want. You upload your artwork, drag it into place, scale it, check for any resolution warnings.
I also recommend taking a minute to click through the “Stores” tab, because that’s where the integration work happens later.
One nice thing, especially for beginners: you don’t pay anything to poke around. Gelato’s free plan gives you everything you need to start publishing products. The upgraded plan: Gelato+ is definitely worth checking out later, but you don’t need it straight away.
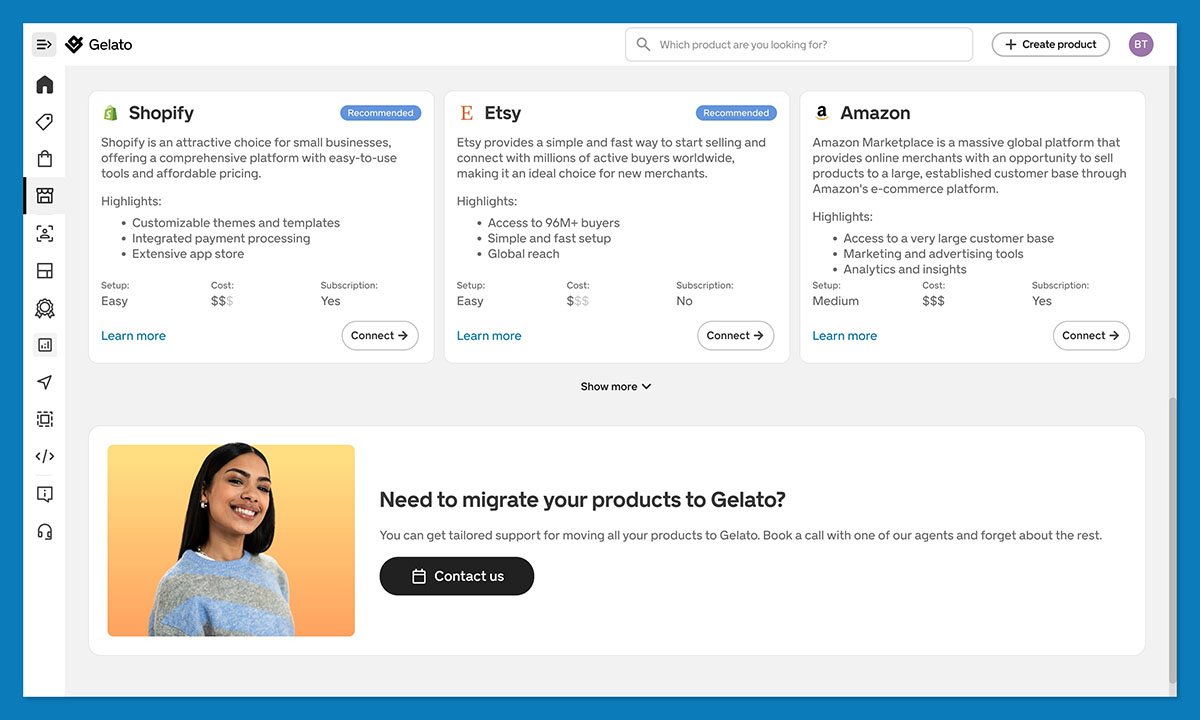
Step 3: Connect Etsy to Gelato
Now you’re ready for the actual integration part, which again, is super simple. Log into your Gelato account first, and visit that “Stores” tab I mentioned above.
Click on Etsy, and you’ll be asked to log-in. Etsy will flash a quick permission screen, basically asking if Gelato can manage orders and listings, and once you approve it, that’s it.
From this point forward, every Etsy order that matches a Gelato-connected product flows right into your Gelato dashboard. Tracking numbers sync automatically when the order ships.
If you run multiple Etsy shops (a surprising number of people do), Gelato can handle them. Just make sure you’re logged into the correct one when you hit “Connect”.
Step 3B: Optional: Migration
If you’re switching from Printful, Printify, or any other POD service, Gelato actually gives you a way to migrate fast. You can:
- Import orders: Gelato spots listings that aren’t linked yet and helps you connect them.
- Attach products one-by-one: tedious but fine if your catalog is small.
- Use a bulk CSV import: the lifesaver for big shops with 50, 100, 500 listings.
If you’re already using Gelato+ (maybe you’re keen to scale fast), you’ll also get the Velocity Switch tool which makes all of this migration work a lot less painful.
Step 4: Choose your Products and Create Your Designs
This is where your store can start feeling like a real brand—not just a product list. The key is to focus on what Etsy shoppers actually buy, and that usually includes:
- Posters and framed prints
- Mugs with inside jokes or names
- Personalised gifts for birthdays or milestones
- Sweatshirts and tees with clean typography
- Wedding and anniversary items
- Pet-themed products with customisation options
Start by building around these proven categories—they align with what Etsy customers already want and are ready to spend on.
Gelato’s catalog lines up neatly with that demand.
- Their art prints and posters are the stars of the show with thick paper, sharp color, and a huge range of options
- Their mugs, sweatshirts, and calendars hold up well too
- They all look and feel premium
When you’ve picked a product, click “Create Order” and you’ll be taken to the designer. You upload your artwork into the design tool. The editor warns you if the resolution’s wonky or if you’re stretching something too far.
I tend to test different placements, especially with wall art. A small graphic in the center gives a totally different mood than a full-bleed edge-to-edge print. The mockup tool helps a lot here. You can preview designs in rooms that don’t look like generic AI houses.
Once the design looks right, you save it as a template and peek at the pricing. Gelato shows you the base cost, and this is where you mentally add Etsy’s fees so you don’t end up selling a poster at break-even. Or you can always use Gelato’s Price Navigator tools to help you.
Step 5: Add Personalization Options
Ok, so you don’t have to do this part if you don’t want to, but honestly, I think it’s one of the best ways to boost your revenue potential early on.
If there’s one thing Etsy buyers can’t resist, it’s seeing their own name, their dog’s name, or the date they met someone slapped onto a product.
Personalization is basically Etsy’s cheat code, and Gelato happened to build one of the smoother personalization setups I’ve used.
Gelato’s editor makes personalisation incredibly straightforward. Once you toggle the personalisation option, you get access to:
- Editable text fields – for names, messages, or captions
- Image upload slots – so customers can add their own photos
- Date selectors – perfect for anniversaries, birthdays, or milestones
- Control over what’s editable – you decide what the customer can change and what stays locked
Compared to other POD tools that rely on clunky workarounds, Gelato’s setup feels polished, like stepping into a clean, well-organised kitchen after struggling in a messy rental.
I’d probably recommend keeping the editable areas simple (one or two fields), because people can panic when you give them too much control.
It’s also worth mentioning that Gelato gives you two ways to handle personalized orders:
- Auto-approve (hands-off, great once you’re comfortable)
- Manual approve (good when you’re paranoid about weird spacing or typos)
There’s a tiny personalization fee on Gelato’s side, but Etsy buyers happily pay a premium for anything that feels custom. One thing that really helps: include a mockup that shows an actual example of personalization. Don’t rely on imagination.
Step 6: Publish to Etsy (and listing tips)
Publishing isn’t really difficult. You hit a button in Gelato and your product appears inside of your Etsy account automatically as a draft (so you can tweak it).
Syncing Products to Etsy (Draft Mode Helps You Avoid Mistakes)
Draft mode is where I do all the finessing. Gelato sends over the basics like the title, description, and mockups, but Etsy is where you shape it into something search-friendly and actually appealing.
Run through the drafts with a few questions:
- Does the title read clearly?
- Are the mockups cohesive or all over the place?
- Did Etsy randomly alphabetize my variants like it loves to do?
- Are my shipping settings correct?
Listing Optimization on Etsy
Once the basics are ready, there are a few things you can do to boost your chances of actually getting seen on Etsy. I recommend looking at:
- Titles: Front-load your primary keyword. Etsy’s search engine skims the first chunk of your title more than anything else. Something like “Custom Pet Mug: Personalized Dog Gift”.
- Description: Skip long, flowery paragraphs. Etsy buyers skim. Your first sentence should include what the item is and who it’s for. Then list materials, size details, personalization notes, and shipping expectations in a clean structure.
- Tags: You get 13. Use all 13. Mix broad keywords (“pet mug,” “personalized gift”) with long-tail ones (“custom dog lover mug,” “gift for new pet parents”).
- Photos: Gelato’s mockups are solid, but I usually mix in a couple of lifestyle shots.
If you ever order samples later, adding real photos can make a noticeable difference in conversion. - Pricing: I keep it honest. Choose your pricing based on: Gelato’s base cost for the product, Etsy’s fees, Etsy’s Payments slice, shipping costs, and the margin you want.
Once this is all set, you hit publish, and your listing is officially live. Etsy takes care of the traffic, and you move on to the part that always makes or breaks a POD shop: fulfillment speed and shipping.
Step 7: Shipping & Fulfillment
Shipping is where a lot of POD dreams fall apart, usually because sellers assume every order will teleport to its destination.
Anyone who’s dealt with long-distance fulfillment knows the pain: customs delays, tracking numbers that go silent, customers who assume you personally hand-deliver their mug to them. But Gelato does make things wonderfully simple.
When someone buys your product on Etsy, the order moves into Gelato automatically. Gelato checks the customer’s location and routes the order to the closest production partner they’ve got.
They’ve built a pretty big network with 140+ facilities across 32 countries, which means a buyer in Spain actually gets their print made in Spain.
Etsy threw everyone a curveball this year by warning sellers about new tariffs in a few regions. People panicked, understandably.
But here’s the upside: because Gelato prints locally, a lot of the tariff drama misses you entirely. You’re not shipping a framed print from the US to Germany. You’re shipping from within Germany. Big difference.
Gelato also syncs delivery profiles into Etsy so your shipping setup isn’t a guessing game. One thing to watch, though: Etsy only allows one shipping profile per listing.
If your product comes in drastically different sizes (like an 8×10 print and a giant 24×36), you’re better off making separate listings or going with a blended shipping strategy.
Step 8: Marketing your Gelato Products
Now, Etsy does a lot of the work involved in “giving” you an audience to sell to, but you still need to grab their attention. A few things worth using:
- Etsy SEO: This is mostly common sense. Think about what you would type if you were buying your product. “Pet portrait print.” “Custom wedding map.” “Funny cat mug.” Start there. Revisit tags and titles on slow listings every couple of weeks to tidy them up too.
- Etsy Ads: I’ve wasted money on ads by boosting listings that weren’t ready. It’s like trying to put a spotlight on a half-finished painting. These days, I only promote the products that already get clicks or saves. A few dollars a day is plenty. Think “gentle nudge,” not “Vegas slot machine.”
- Social Media Promotion: You don’t need to become an influencer. A few posts on Pinterest go a long way, especially for prints and home decor. I’ve had pins send traffic months after I forgot I even posted them. Instagram works for showing off mockups or behind-the-scenes snippets. TikTok is surprisingly good for quick “making of” videos.
- Reviews Strategy: People forget to leave reviews unless you make it easy. I send a short, friendly note after each purchase, nothing scripted or salesy. It’s basically, “Hey, thanks for supporting the shop, hope you love it.”
- Product Expansion & Seasonal Drops: Etsy likes active shops. If you add new designs regularly (even if it’s just one or two a week) the algorithm notices. And buyers love seasonal drops. Halloween prints, Christmas ornaments, wedding season gifts, whatever you like.
Step 9: Scaling with Gelato+
Like I said above, you don’t need to start with Gelato+ straight away. Most people stick with the free plan for years, particularly when they’re just selling on a channel like Etsy.
Still, if your business does start to grow, Gelato+ can deliver a lot of perks:
- Better margins. The product discounts can be surprisingly generous. If you’re selling at any real volume, those savings matter.
- Magic Mockups. These are legitimately good. They make your listings look polished without spending half a day in Photoshop.
- Creative Vault. Handy when you’re building collections or testing themes and don’t want to dig through ten different asset libraries.
- Velocity Switch & Instant Collections. These feel like cheat codes for anyone migrating from another POD service or trying to push out a batch of listings in one sitting.
- Branding perks. Branded packaging and inserts make you look like a grown-up brand, not someone scrambling in the background.
It’s not a must-have for small shops, but once you’re uploading regularly or you’re juggling multiple niches, it’s definitely worthwhile.
Launching Your Brand with Gelato and Etsy
Etsy and Gelato aren’t perfect, but they fit together in a way that actually respects your time and creativity.
Etsy brings the eyeballs; Gelato handles the messy production part; you get to focus on the kind of work that made you want to start a shop in the first place.
If I were opening a brand-new Etsy shop today, this is the setup I’d choose. Start with a handful of products (five to ten is plenty) pay attention to what gets views, refresh your tags once in a while, add designs consistently, and make the most of your reviews.
When you reach the point where you feel ready to really grow, start looking into Gelato+ for major product discounts and extra tools.